How to Create a Web Augmented Reality Treasure hunt
Contents
In this post we are going to explain in a simple way how to create your own digital scavenger hunt with augmented reality and GPS maps, for web browsers, that is, with Web AR. To illustrate this example step by step we will take as a starting point one of the existing experiences in our public library, where you can find templates or projects already created with which you can start using Onirix without having to start from scratch.

Thanks to this starting point, creating a Treasure hunt (also known as scavenger hunt) and sharing it with your first players or trying it yourself will literally take a few minutes. Let’s get started!
What is a treasure hunt game?
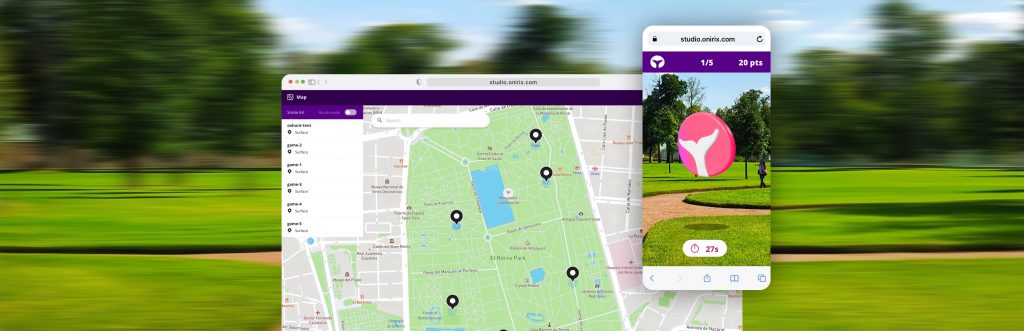
As we explained previously in another post about Treasure Hunt with web AR, it is a game where the ultimate goal is to find one or more treasures, solving tests or riddles and obtaining associated rewards. What makes it different from any other game is that, in addition, these tests are usually hidden in different locations. Thanks to technology, we can set those locations on a map with GPS positions or also in different images to recognize (for example on the pages of a magazine), etc.
In this case we will focus on creating a Treasure hunt with a map and GPS positions.
How can I launch my own game with Onirix?
To shape this game and be able to start playing, what you need is to follow these simple steps:
- Create an account in Onirix Studio (if you don’t have one yet):
- Familiarize yourself with our tool: navigate through the different screens (projects, Assets or contents, user menu…). Got it? Let’s go to the next step.
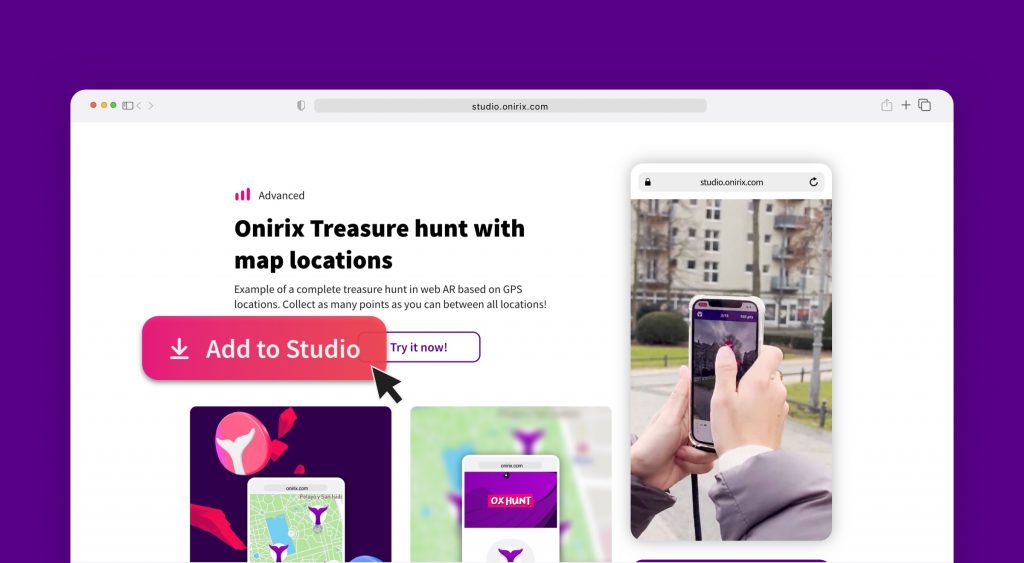
- Download this Treasure Hunt experience with locations map from our library. This will create a copy on your Projects page with everything you need to get started:
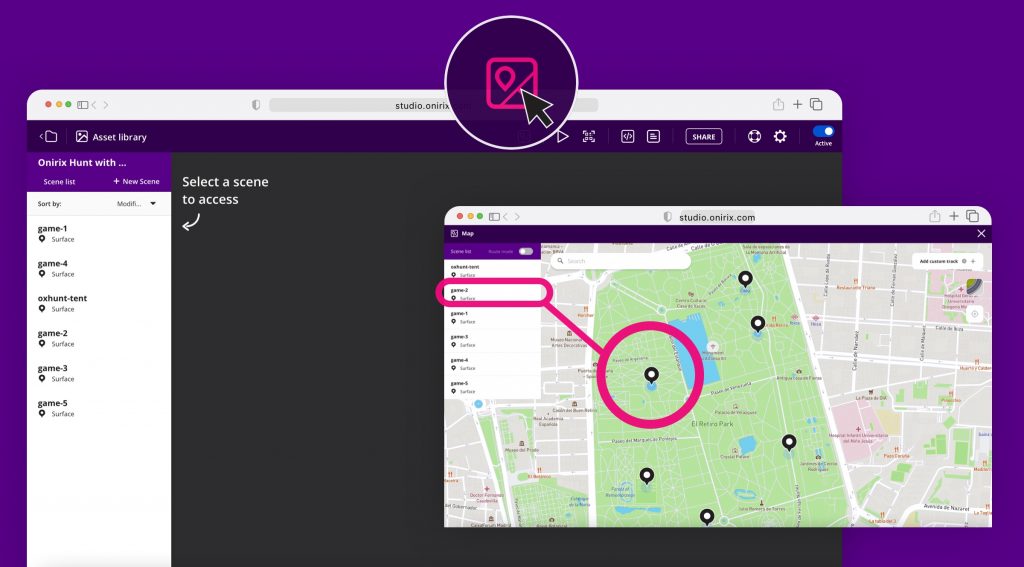
4. Access the experience map and place the game points in an area close to your or your players’ position. This way you can test the dynamics with your own map:
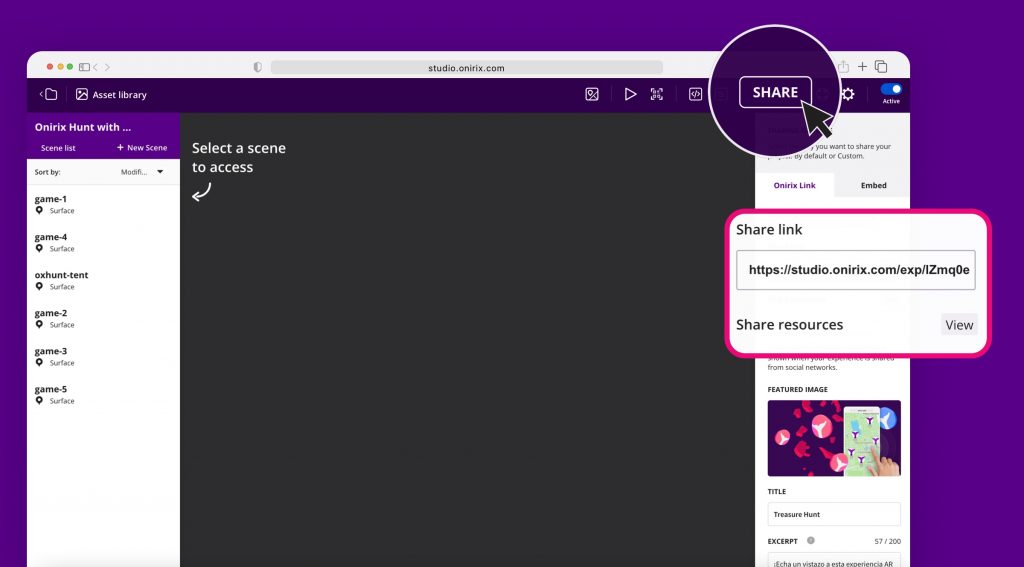
5. When you have the locations you want simply access the QR or sharing link and send it to whomever you want. You can start by testing the experience yourself:
That’s it! Open the experience and start hunting for logos in the different locations. How many points are you able to get?
How can I customize the game for my audience, client or company?
Within Onirix Studio there are several levels of customization possible for AR experiences. As a first level we have already seen that you can place the locations wherever you want. But, in addition to this, you could also modify the visual aspect and the logic of the experience: colors, logos, 3D elements, sounds, general styles of the map and screens, texts, game logic, etc.
To perform this customization there are two main tools in Onirix: Scene Editor and online code editor.
Modifying the contents of the game: scene editor
First of all, to know in more detail the contents of the games in each location, we have an experience in our library where you can access the game independently: hunting and destruction of logos in AR. However, in this experience we already have copied these games in each location (in the template we provide 5 points of interest).
Scene elements and contents
If we open the assets library of the scene editor and we place ourselves inside the newly created project, we will see the models and assets included and we will be able to preview them (sounds, animations, etc).
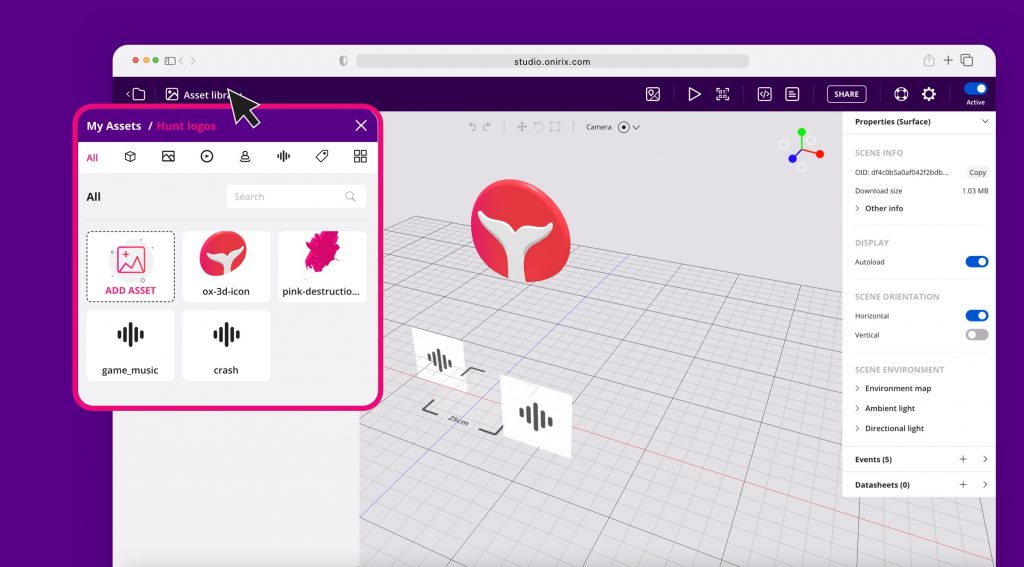
Within the scene editor there are several elements that can be modified in order to change the appearance or content of the included games:

- 3D models: logos and destruction animations.
- Sounds: game music, destruction sound.
- Orbitals: collections of logos that will appear rotating around the user.
Initial interaction events
In addition to this it will also be possible to edit the events that define how the orbitals start rotating around the user when the scene loads. They are not visible because they are set as not visible, but we can enable/disable this property to work with the scene in a simple way. For example, if we select a particular Orbital, we will see that it has the property disabled. If we activate it momentarily we can see something like this:
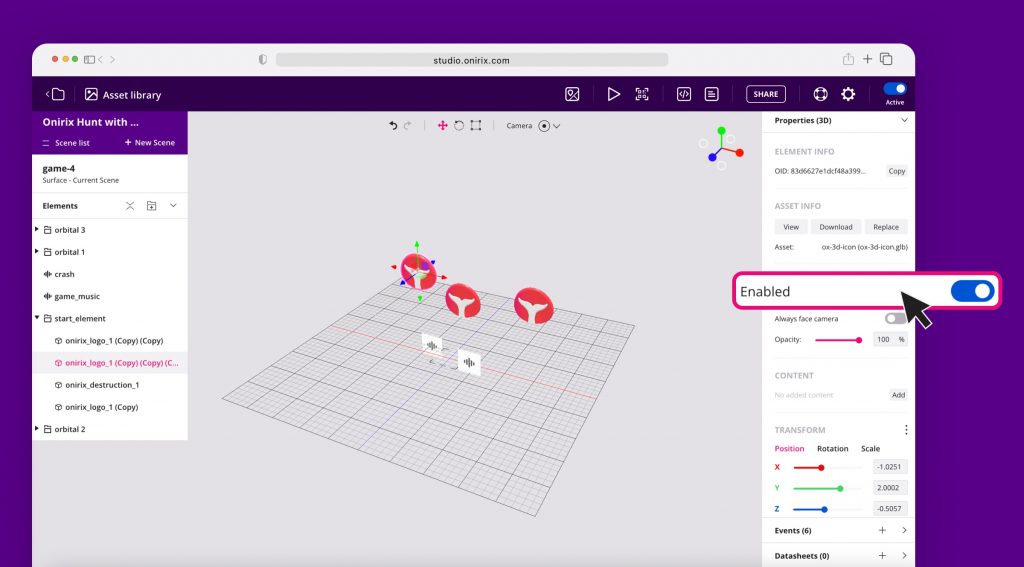
That set of invisible logos will appear as soon as the user clicks on the initial logo, the one in the center of the scene. And it is those logos included in the Orbital that we can modify through the events:
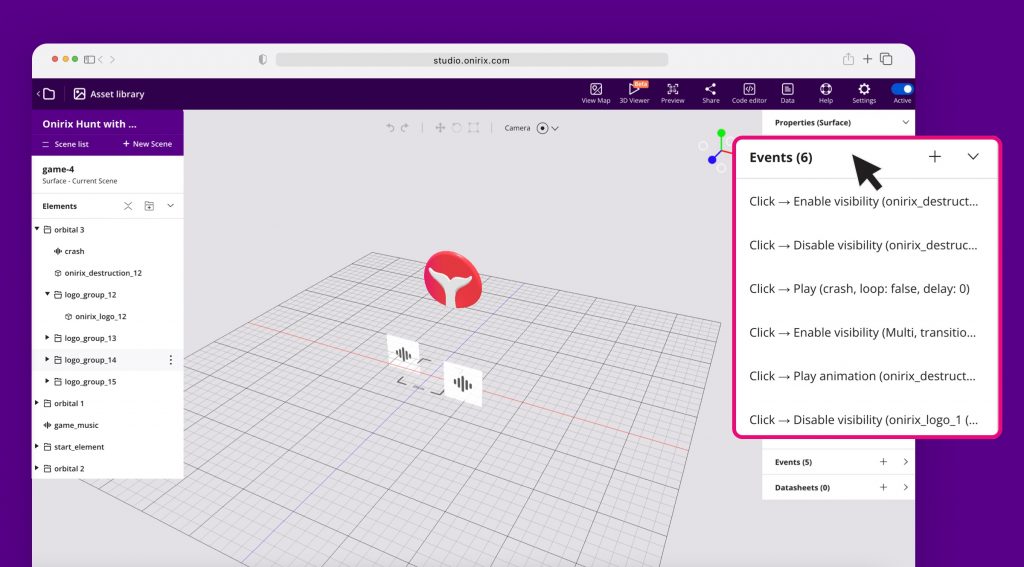
Try changing some of the parameters of these events and you will notice differences in the speed or direction of rotation of the game elements. go ahead!
Modifying the visual and logical aspect of the experience: code editor
If we want to go a step further and modify the style of the game, either any of the screens or the elements that are part of the game interface, we can do it from the code editor.
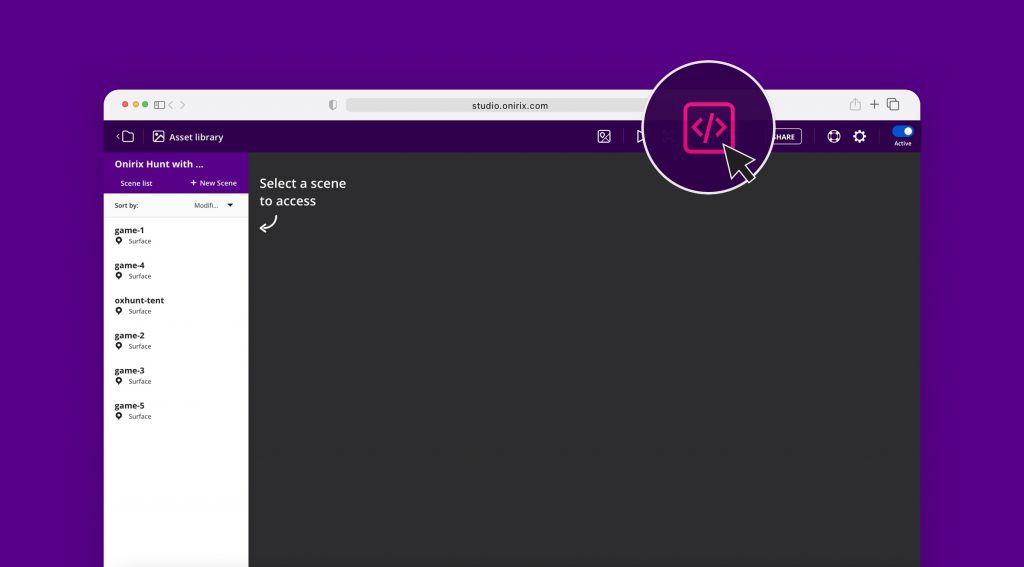
This editor will give us access to the HTML, CSS and JavaScript components of the experience, where each and every visual part of the experience is defined, as well as its logic.
Modifying components and styles: HTML and CSS
Let’s imagine that what we are looking for is to modify the visual content of the game. Let’s look at the screen at the end of the game where the total points achieved are displayed:

If we enter the code editor we will see that there are some elements that serve to define precisely this component, as in any web page:
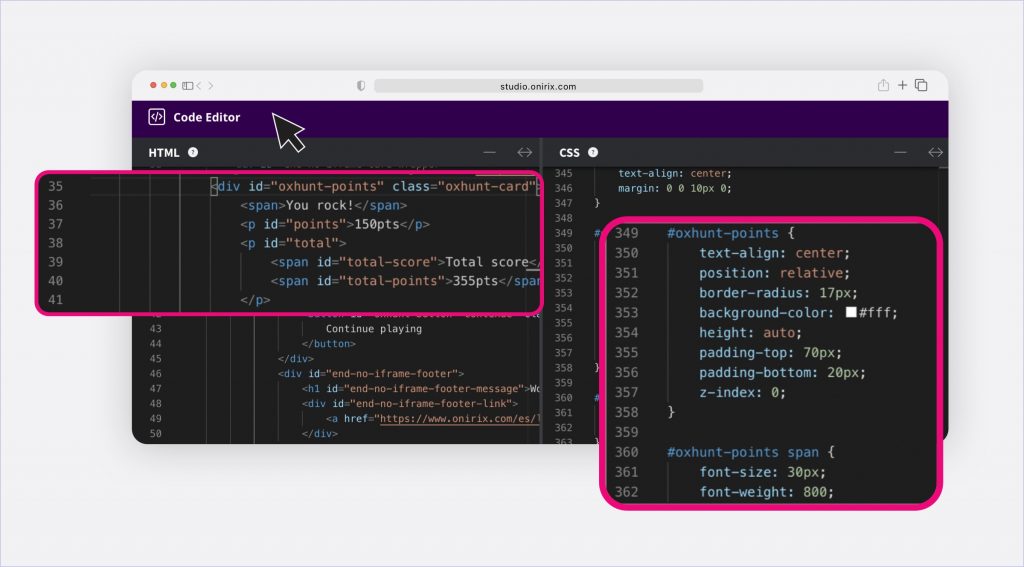
In this example we can notice that the HTML component (div) with the identifier “oxhunt-points” is the one that contains the part where we show the user the phrase “You rock!” and the total of points achieved:
<div id="oxhunt-points" class="oxhunt-card"> <span>You rock!</span> <p id="points">150pts</p> <p id="total"> <span id="total-score">Total score</span> <span id="total-points">355pts</span> </p> <button id="oxhunt-button--continue" class="oxhunt-button oxhunt-button--pink">Continue playing</button> </div>In the CSS window we can see that we style the block, defining its border, background color, text alignment, etc. This happens for the whole set of elements in the game:
#oxhunt-points { text-align: center; position: relative; border-radius: 17px; background-color: #fff; height: auto; padding-top: 70px; padding-bottom: 20px; z-index: 0; } #oxhunt-points span { font-size: 30px; font-weight: 800; }Modify game logic: JavaScript component
Starting from that same example we can see how inside the JavaScript code we have a block in which the points obtained in each game are filled, depending on what the player gets.
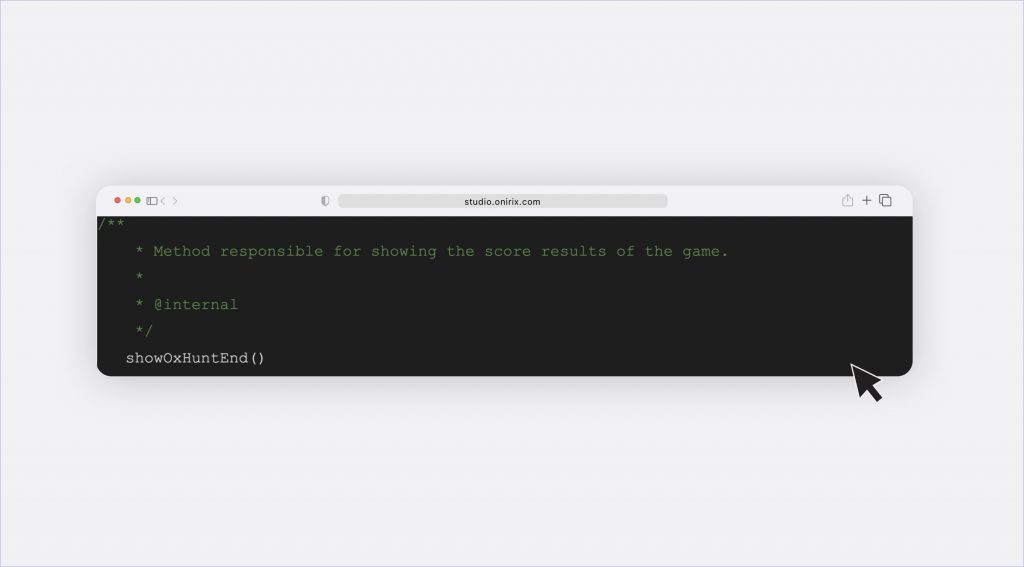
All the rest of the logic, from sound activations, calculation of each point and destruction activation to final scores, etc, is defined in this part of our code editor. To be able to understand and modify this part of the experience you would need to have a minimum knowledge of web development and JavaScript. We also provide our Embed SDK, where we define the different events and interactions that can be carried out.
Anyway we provide you with all the code structure with comments so that this modification and understanding of the code is much faster than if you had to do it completely from scratch.
Final conclusions
In this post we show you a very simple way to create and launch your first web augmented reality Treasure hunt with an associated GPS map. In a few minutes you can have it up and running and shared with your end users. In addition, we give you more extensive information in case you want to modify parts of the experience, from a high level or general point of view, to a very specific and lower level point of view.
With this type of templates you have access to the creation of experiences that are easily applicable in various sectors such as advertising, marketing, events or festivals and that can be assembled and adapted in a few hours.
We hope you find it useful and that you can offer new projects and dynamics to your clients thanks to our examples and augmented reality templates.
